

How to install compression in IIS
Static compression is installed by default when installing Web Server. But dynamic compression should be enabled manually.
Install Dynamic Compression
- Open Server Manager.
- In Server Manager, click the Manage menu, and then click Add Roles and Features.
- In the Add Roles and Features wizard, click Next. Select Role-based or feature-based installation and click Next.
- Select the destination server and click Next.
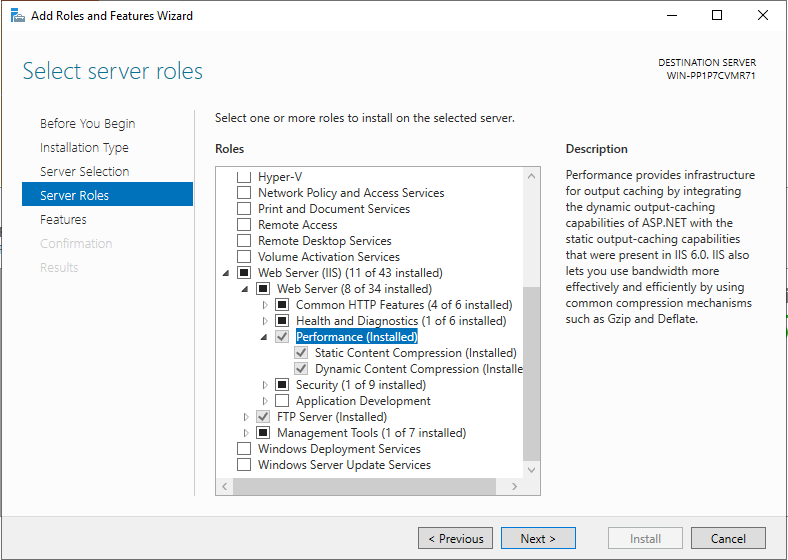
- On the Server Roles page, expand Web Server (IIS), then expand Web Server, expand Performance, and then select Dynamic Content Compression. Click Next.
- On the Select features page, click Next.
- On the Confirm installation selections page, click Install.
- On the Results page, click Close.
Configure HTTP compression in IIS
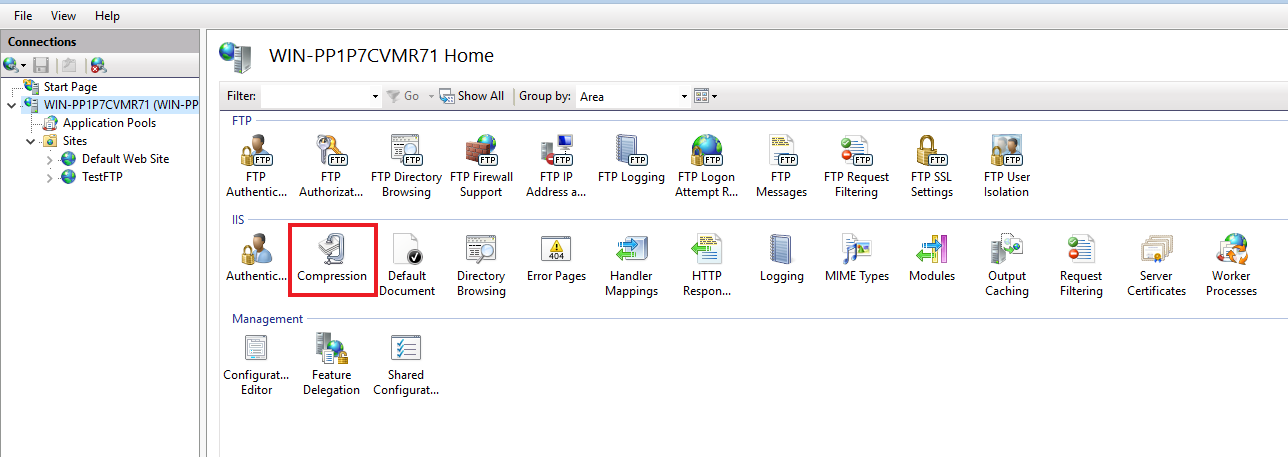
- Open Internet Information Service (IIS) Manager.
- Select the server in the connection window.
- Select Compression under the IIS area.
- Select Dynamic and Static content compression accordingly.
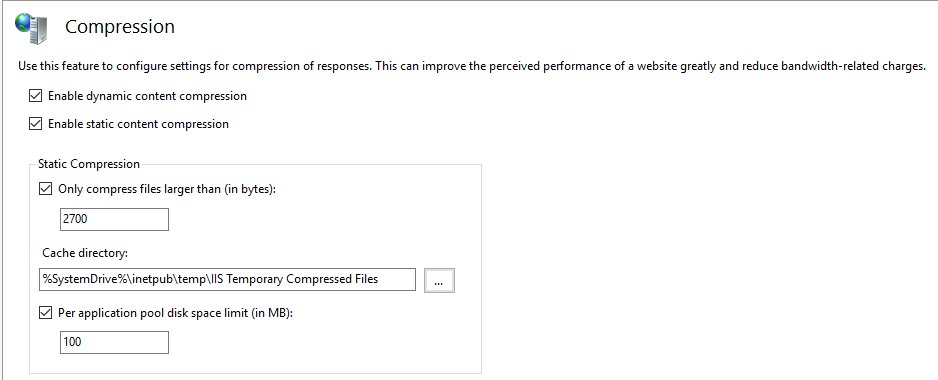
- If enable Static content compression, select whether to compress all files or files larger than specified file size.
- If enable Static content compression, select the cache directory path.
- If enable Static content compression, select maximum cache size allocated per application pool.
- Then Apply to save the configuration.
After that, we need to configure what are the HTTP content should be compressed.
- Go to “C:\Windows\System32\inetsrv\config”
- Open applicationHost.config with a text editor
- Go to “<httpCompression>” element
- Add missing content HTTP types that want to compress under dynamicTypes and staticTypes
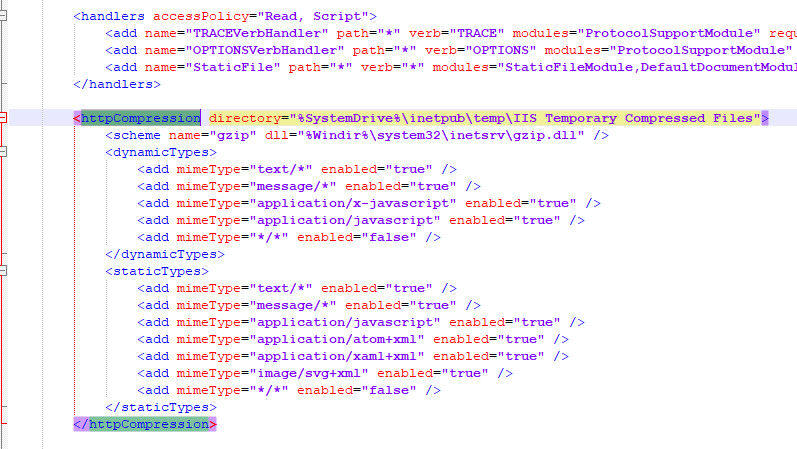
- Then go to “<serverRuntime>” element And add frequentHitThreshold and frequentHitTimePeriod attributes. In order to compress, number of frequentHitThreshold, request should happen within the frequentHitTimePeriod.
- frequentHitThreshold: Specifies the number of times a URL must be requested, within the period specified in the frequentHitTimePeriod attribute, to be considered frequently hit. The value must be between 1 and 2147483647. The default value is 2.
- frequentHitTimePeriod: Specifies the time interval in which a URL must be requested the number of times specified in the frequentHitThreshold attribute before it is considered to be frequently hit. The default value is 00:00:10 (10 seconds).

- According to example image, after a one URL request compression is enabled for the same request for next 10 hours.
- Next, Save the file