Google Drive Image upload using OAuth
Every day you use hundreds of websites, and you must register at least halfway. Remembering hundreds of different login credentials is impossible for human beings. Therefore, this is a place where OAuth can help to solve the problem of the online experience. OAuth was created to provide a seamless user experience for users of online Web applications. If you are interested to know how to do that, then you are in the correct place.
We are going to implement an application for image uploading to google drive using OAuth. Therefore, first, we need to get some idea about authorization and authentication. Let’s talk about what they are. Authentication means verifying your identity while authentication allows access to the system. Basically, authentication is the process of verifying who you are and, authorization is the process of verifying what you have access to.
When we talk about OAuth, OAuth is an open standard for delegation of access, typically used by Internet users to allow websites or applications to access information from other websites, but it does not provide a password.
Let’s look at the following example.
01. REGISTERING THE APPLICATION
- CREATE A CLIENT APPLICATION
First, you must create and register an application in the Google Developer Console. For that Navigate to https://console.developers.google.com/
By clicking the above link, you will navigate to the google developer console dashboard. Click the dropdown list which lists all the created applications as mentioned in the below picture.

Then, select New Project to create a new application.
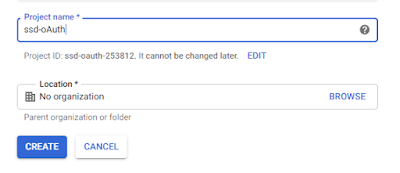
Name the project as “ssd-oAuth” and set the location as it is and click the create button to create the application. When google successfully created the application, select the application from the top dropdown list.
After that, select the Library tab and Search for “Google+ API” and enable it. When the Google+ API is turned on, Google apps can get information about the user such as username, name, photo, and email. It also looks for the “Google Drive API” and enables both. Then move to the OAuth consent screen tab.
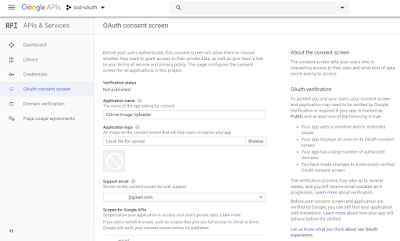
Fill the basic information about the application and click on the Save button. Then you will navigate to the Credentials tab.
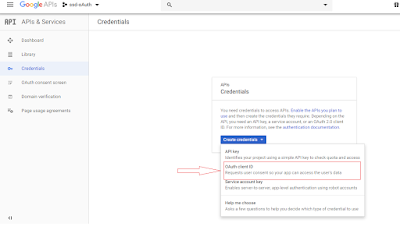
In the Credentials tab, select the OAuth Client ID from the create credentials dropdown.
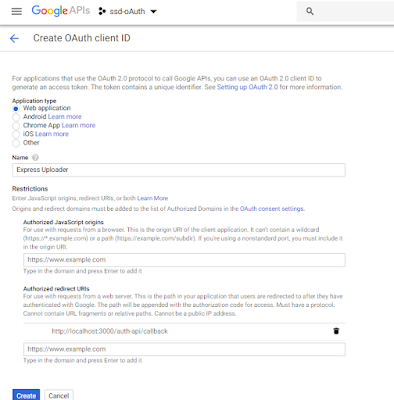
In the above section, you should select the type of application. Select the application type as a “web application” and set the name as “Express Uploader” (You can set your own custom name). The registration process of the application requires a redirection URI. Provide it as “http://localhost:3000/auth-api/callback.”
The redirect URI is an important part of the OAuth feed. If the user successfully authenticates the application, the authentication server redirects the user to the application by using an authentication code or access token in the URL.
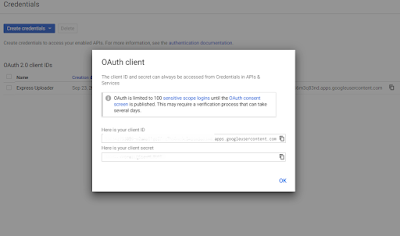
If the creation succeeds, the client ID and the Client secret credentials are displayed as shown in the above picture. Copy those credentials into the Notepad. It will require for back-end application.
02. Building the Client Application
The application creates using ExpressJS and AngularJS, which allows you to upload images to Google Drive. Since this application uses Authorization Code Grant Type to demonstrate the OAuth first, we need to get the Authorization Code from the authentication server.
- The Authorization Code Flow
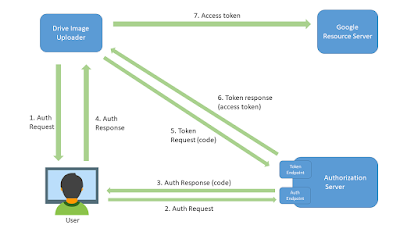
Authorization code grant types are used in web and mobile applications. Unlike most other types of grants, the app must first launch the browser and start the feed. These are the high-level step of the flow:
- The application opens a browser and sends the user to the OAuth server using the Google OAuth API
- The authorization prompt displays to the user for approving app request
- The Google OAuth server validates the backend and the user redirects to the application by using an authorization code in the query string.
- The application sends a callback request with an authentication code to obtain an access token.
- The application exchanges the authentication code of the access token
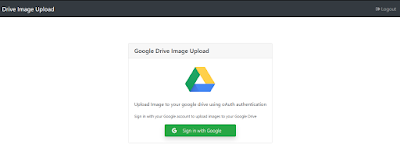
The login page has a ‘Sign in with Google’ option. By clicking that button, the application will redirect to the request URL that the Google authorization endpoint requests from the client application.

Generate the OAuth URL
https://accounts.google.com/o/oauth2/v2/auth?access_type=offline&scope=https%3A%2F%2Fwww.googleapis.com%2Fauth%2Fdrive.file%20https%3A%2F%2Fwww.googleapis.com%2Fauth%2Fdrive.metadata.readonly%20https%3A%2F%2Fwww.googleapis.com%2Fauth%2Fplus.me&response_type=code&client_id=xxxxxxxxxxxx-69lb72a5v16akofnjis8ruijs1u2b3hv.apps.googleusercontent.com&redirect_uri=http%3A%2F%2Flocalhost%3A3000%2Fauth-api%2Fcallback
The above request consists of several query parameters.
- “Access_type” indicates, if the user is not in the browser, the application can renew the access token.
- “Client_id” – which creates when the application registers with the google developer console.
- “redirect_url” – After the user completes the authorization process, the API server redirects the user to the given redirect URL.
- “response_type” indicates the expected response from the server.
- “scope” indicates the permissions requested by the application.
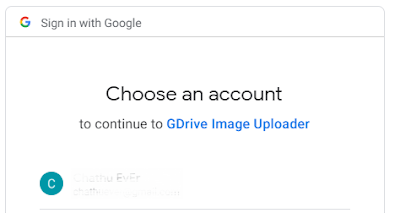
Prompt to grant access
- Redirect to the application
When the user approves the request, the authorization server redirects the user to the redirect URL configured in the application.
Token Exchange
When the user is redirected to our application, the query string contains the code. Here, a request is sent to the Google token endpoint to exchange the authentication code for the access token. The request includes a private client secret and a public client id. In addition, the same redirection URL as before is sent with the authentication code.
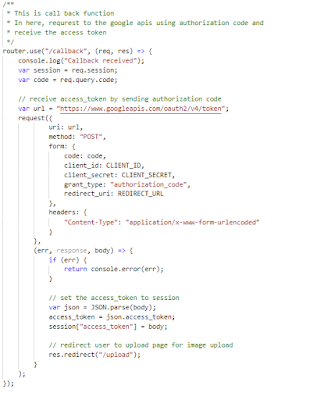
Request Token
When everything is checked out, Google generates an access token and sends it back to the response. The server granted the Authorized requests using stored access token and refresh token. Register the access token in the session and when you successfully sign in to your Google Account, you will be redirected to the image upload page.
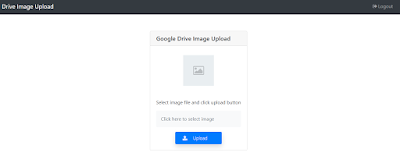
Image Uploading Interface
You can now use this app to upload images to Google Drive. After uploading the images using this app, check Google Drive. You can see that the uploaded picture is in Google Drive.
")